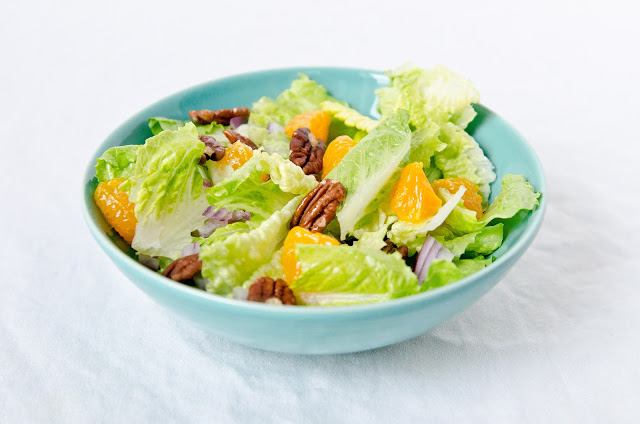
Toasted Pecan + Mandarin Orange Salad

Things have been pretty slow over here on The Fig Tree over the past few weeks. My apologies! However, the semi-hiatus has been for a good reason! I’m in the middle of making some big changes to the blog. My focus has been more on blog design these days rather than actual recipe development. Thankfully, I should finally debut the new + improved Fig Tree and resume a regular posting schedule by the end of January. So excited for the changes to go live! 

In the meantime, here is one of my favourite salad recipes. It’s a salad that my mom frequently makes throughout the summer. I realize, in most parts of the world, it’s FAR from being summer. But after we had a blizzard here on Friday, I needed something summery to keep my spirits up. This salad was perfect. The citrus was nice and refreshing. The romaine was perfectly crisp. And you cannot go wrong with toasted pecans. :)

Hope you all have a fantastic week. xo


Ingredients
  • 1/4 cup of white sugar
  • 1/4 cup of white vinegar
  • 1/2 cup of canola oil
  • 1 teaspoon of salt
  • pepper to taste
  • 1/2 teaspoon of dry mustard
  • 1 tablespoon of water
  • 1/4 of a small red onion, chopped
  • mandarin orange; supremed (or canned mandarin oranges in juice)
  • 3/4 cup of pecans; toasted
  • 4 to 6 cups of romaine lettuce, torn into bite sized pieces

Method

1. Combine the sugar, vinegar, canola oil, salt, pepper, dry mustard and water in a small bowl. Allow the dressing to sit for at least 30 minutes to develop flavour. 

2. In a large salad bowl, toss together the romaine lettuce, red onion, pecans and mandarin orange segments.

3. Drizzle half of the dressing over the salad, adding more if required. Toss well and serve. Note: Leftover dressing lasts up to a week in the fridge.

Yield: 4 to 6 servings of salad

Source: Mom; original source unknown
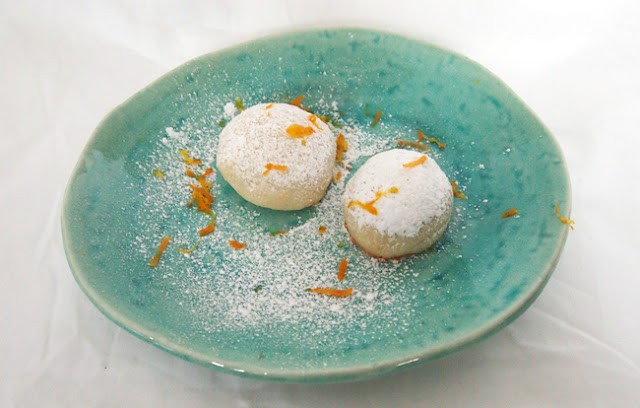
Orange Snowball Cookies || Guest Post

It may be Sunday and the dreaded Monday is nearing quickly. *pouts* But in an effort to make Monday a bit more tolerable, I present to you a fantastic guest post from my cousin Liz. These cookies will undoubtedly sweeten up the beginning of your work week. Liz has a wonderful blog called Edge + Vertex. She writes about all sorts of great stuff including her daily life, her favourite fashion finds, crafts….and baking! :) She’s utterly adorable and you cannot help but fall in love with her through her blog. She’s seriously cool. I am so very happy my cousin decided to marry this great girl and officially make her apart of the family. xoxo

Make sure to check out Liz’s blog and leave her a comment or two. Without further ado…here’s Liz!

I like baking. I really do. But as I have stated many times on my blog, I am exceedingly lazy. I just thought of something…I would be a way more interesting person if I were less lazy…huh…

But, I digress. I like baking, and Christmastime is the time when I roll up my sleeves and get the job done. Although, it’s usually a 12 hour stint (often ending at 3 in the morning…), I really enjoy my time since I make an event out of it. I watch/listen to some awesome Christmas movies and music, and I just putter about, creating stuff.

This year, I made orange-scented snowballs, amongst other delightful delicacies. They are very easy to make and even easier to eat! I would recommend having them with a cup of Earl Grey tea flavoured with a hint of lemon and sugar.

Ingredients
  • 1 cup of unsalted butter, at room temperature
  • 1/2 cup of confectioner’ sugar (icing sugar)
  • 1/2 teaspoon of orange extract or 2 teaspoons of finely grated orange zest
  • 1/8 teaspoon of salt
  • 2 cups of all-purpose flour
  • 3/4 cup of sifted icing sugar for rolling/topping

Note: Real orange zest is the surest way to go for the best flavour. You may want to use more than 2 teaspoons if you want a stronger orange flavour.

Method

1. Preheat the oven to 350’F.

2. In a large bowl, beat together the butter, 1/2 cup of icing sugar, the orange extract (or zest) and salt until smooth/creamy with an electric mixer. 

3. On low speed, beat in the flour just until the dough is mixed. Dough will be medium-stiff.

4. Pinch off pieces of the dough and roll between your palms into 1 inch balls. Place cookies on an ungreased cookie sheet, spacing them about 1 1/2 inches apart.

5. Bake in the centre of the oven until the tops are set to the touch and the bottoms are slightly golden (10 to 12 minutes). Let the cookies cool on the cookie sheets until they are warm, but firm enough to handle without crumbling.

6. Spread the 3/4 cup of sifted icing sugar on a plate. Roll the warm cookies in the sugar, coating them evenly. Set cookies on wire cooling racks. When the cookies have cooled completely, roll them in sugar again. 

Note: Now, maybe I’m bad at baking (that is a definite possibility), but I did not like the result of rolling the cookies. What I did instead was wait until I was ready to package the cookies and then I just dusted them with icing sugar and a bit of orange zest. 

Source: Very Merry Cookie Party (Grunces + Van Vynckt)

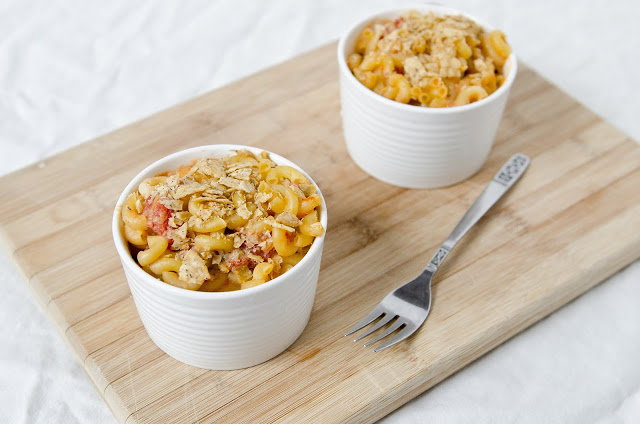
Mexican Mac + Cheese

Hello and happy new year! Hope you all had a wonderful time ringing in 2013. We had a nice quiet night with some friends on New Years Eve. New Year’s Day, we met some friends for lunch to celebrate the new year. It was great catching up with some close friends from out-of-town. And, in the evening, my sister had us over for a fantastic meal. My dad insisted we have an ice cream sundae party to end dinner last night – which I definitely agreed to. We had plain vanilla ice cream with fresh fruit, nuts, and yummy chocolate sauce. It was a really fun idea. A lovely way to start the new year. 

Another great way to start the new year is to make this extremely delicious macaroni and cheese infused with Mexican flavours. It’s one of my very favourite dishes with some of my very favourite ingredients – lime, cumin and cilantro. And cheese! It’s a little spicy but perfectly creamy and satisfying. The whole grain taco chips on top add a really nice crunch to the mac n cheese. This dish is highly addictive and the epitome of comfort food – especially when it’s so darn chilly outside these days! Brrrr!

I’ll be back in a few days with a lighter dish. After overdosing on sweet over the holidays, I’ve been craving fresh fruits and veggies. I’m sure a lot of you feel the same way. I’m hoping to share a delicious main course salad over the next few days. Stay tuned :)
Ingredients
  • 1 pound of dried macaroni noodles
  • 1 tablespoon of olive oil or canola oil
  • 1 medium onion, chopped
  • 1 jalapeño, seeded and diced (optional)
  • 3 cloves of garlic
  • 1-28 ounce can of diced tomatoes (or 12 tomatillos, husked and chopped)
  • 1 teaspoon of ground cumin
  • 1 tablespoon of honey
  • juice of half a lime
  • handful of cilantro
  • 3 tablespoons of butter
  • 3 tablespoons of flour
  • 1 cup of vegetable stock
  • 2 cups of skim milk
  • salt and pepper to taste
  • 2 cups of monterey jack cheese or cheddar cheese
  • 1 cup of crushed whole grain tortilla chips

First, make the tomato/tomatillo salsa: 

1. Place garlic in a food processor and process until it is finely chopped. Add the onion + jalapeño and process. Add the canned tomatoes or tomatillos and process until chunky. 

2. Add the olive oil or canola oil to a medium sauce pan over medium heat. Add the tomato or tomatillo mixture and warm through. Add the cumin, salt, pepper and honey. Simmer for 10 minutes on low. Add the cilantro and lime juice.

Second, make the cheese sauce + boil the noodles:

1. Preheat the oven to 350’F. Bring a large pot of water to boil. Salt the water well.

2. Meanwhile, melt the butter in a medium saucepan over medium heat. Whisk in the flour and cook for a minute. Whisk in the vegetable stock and the milk. Season with salt and pepper. Cook for about 5 minutes or until the sauce begins to thicken up. Add the monterey or cheddar cheese.

And finally, put it all together + bake:

1. Drain the pasta and toss with the cheese sauce. Place half of the noodles in a 9 x 13 baking dish and top with half of the salsa. Spoon remaining noodles on top and then the remainder of the salsa. Top with the crushed chips and bake for 15 minutes. Once cooked through, put the broiler on to toast the chips on top. 

Serve with sour cream, extra salsa or fresh guacamole.

Note: I often make this mac n cheese and put it into 8 different ramekins rather than one large pan. This allows me to control portion size a bit better. When it comes to mac n cheese, I often over eat. So individual portions are nice in this case.

Yield: 6-8 servings

Source: adapted from a recipe from Rachel Ray