Sweet Corn & Basil Penne Casserole

20130526-DSC_9155-2Hello! I hope you all had a lovely weekend. My weekend was really nice even if I was not feeling well. My body is crazy slow at recovering from jet lag! Saturday, Jesse and I checked out some neat old buildings downtown in an event called “Doors Open Winnipeg.” It was neat to learn the history of the buildings around our home. We live in an area where old warehouses and such have been transformed into condos, apartments, shops and restaurants. It was really fun learning more about our neighbourhood’s past. Saturday evening, Jesse and I met some of our friends for the “dinner-of-the-month” club. This month, we met up at an Argentine pizza place called Corrientes. Excellent food and even better company. After dinner, we went for some late-night gelato and laughed until our sides hurt.

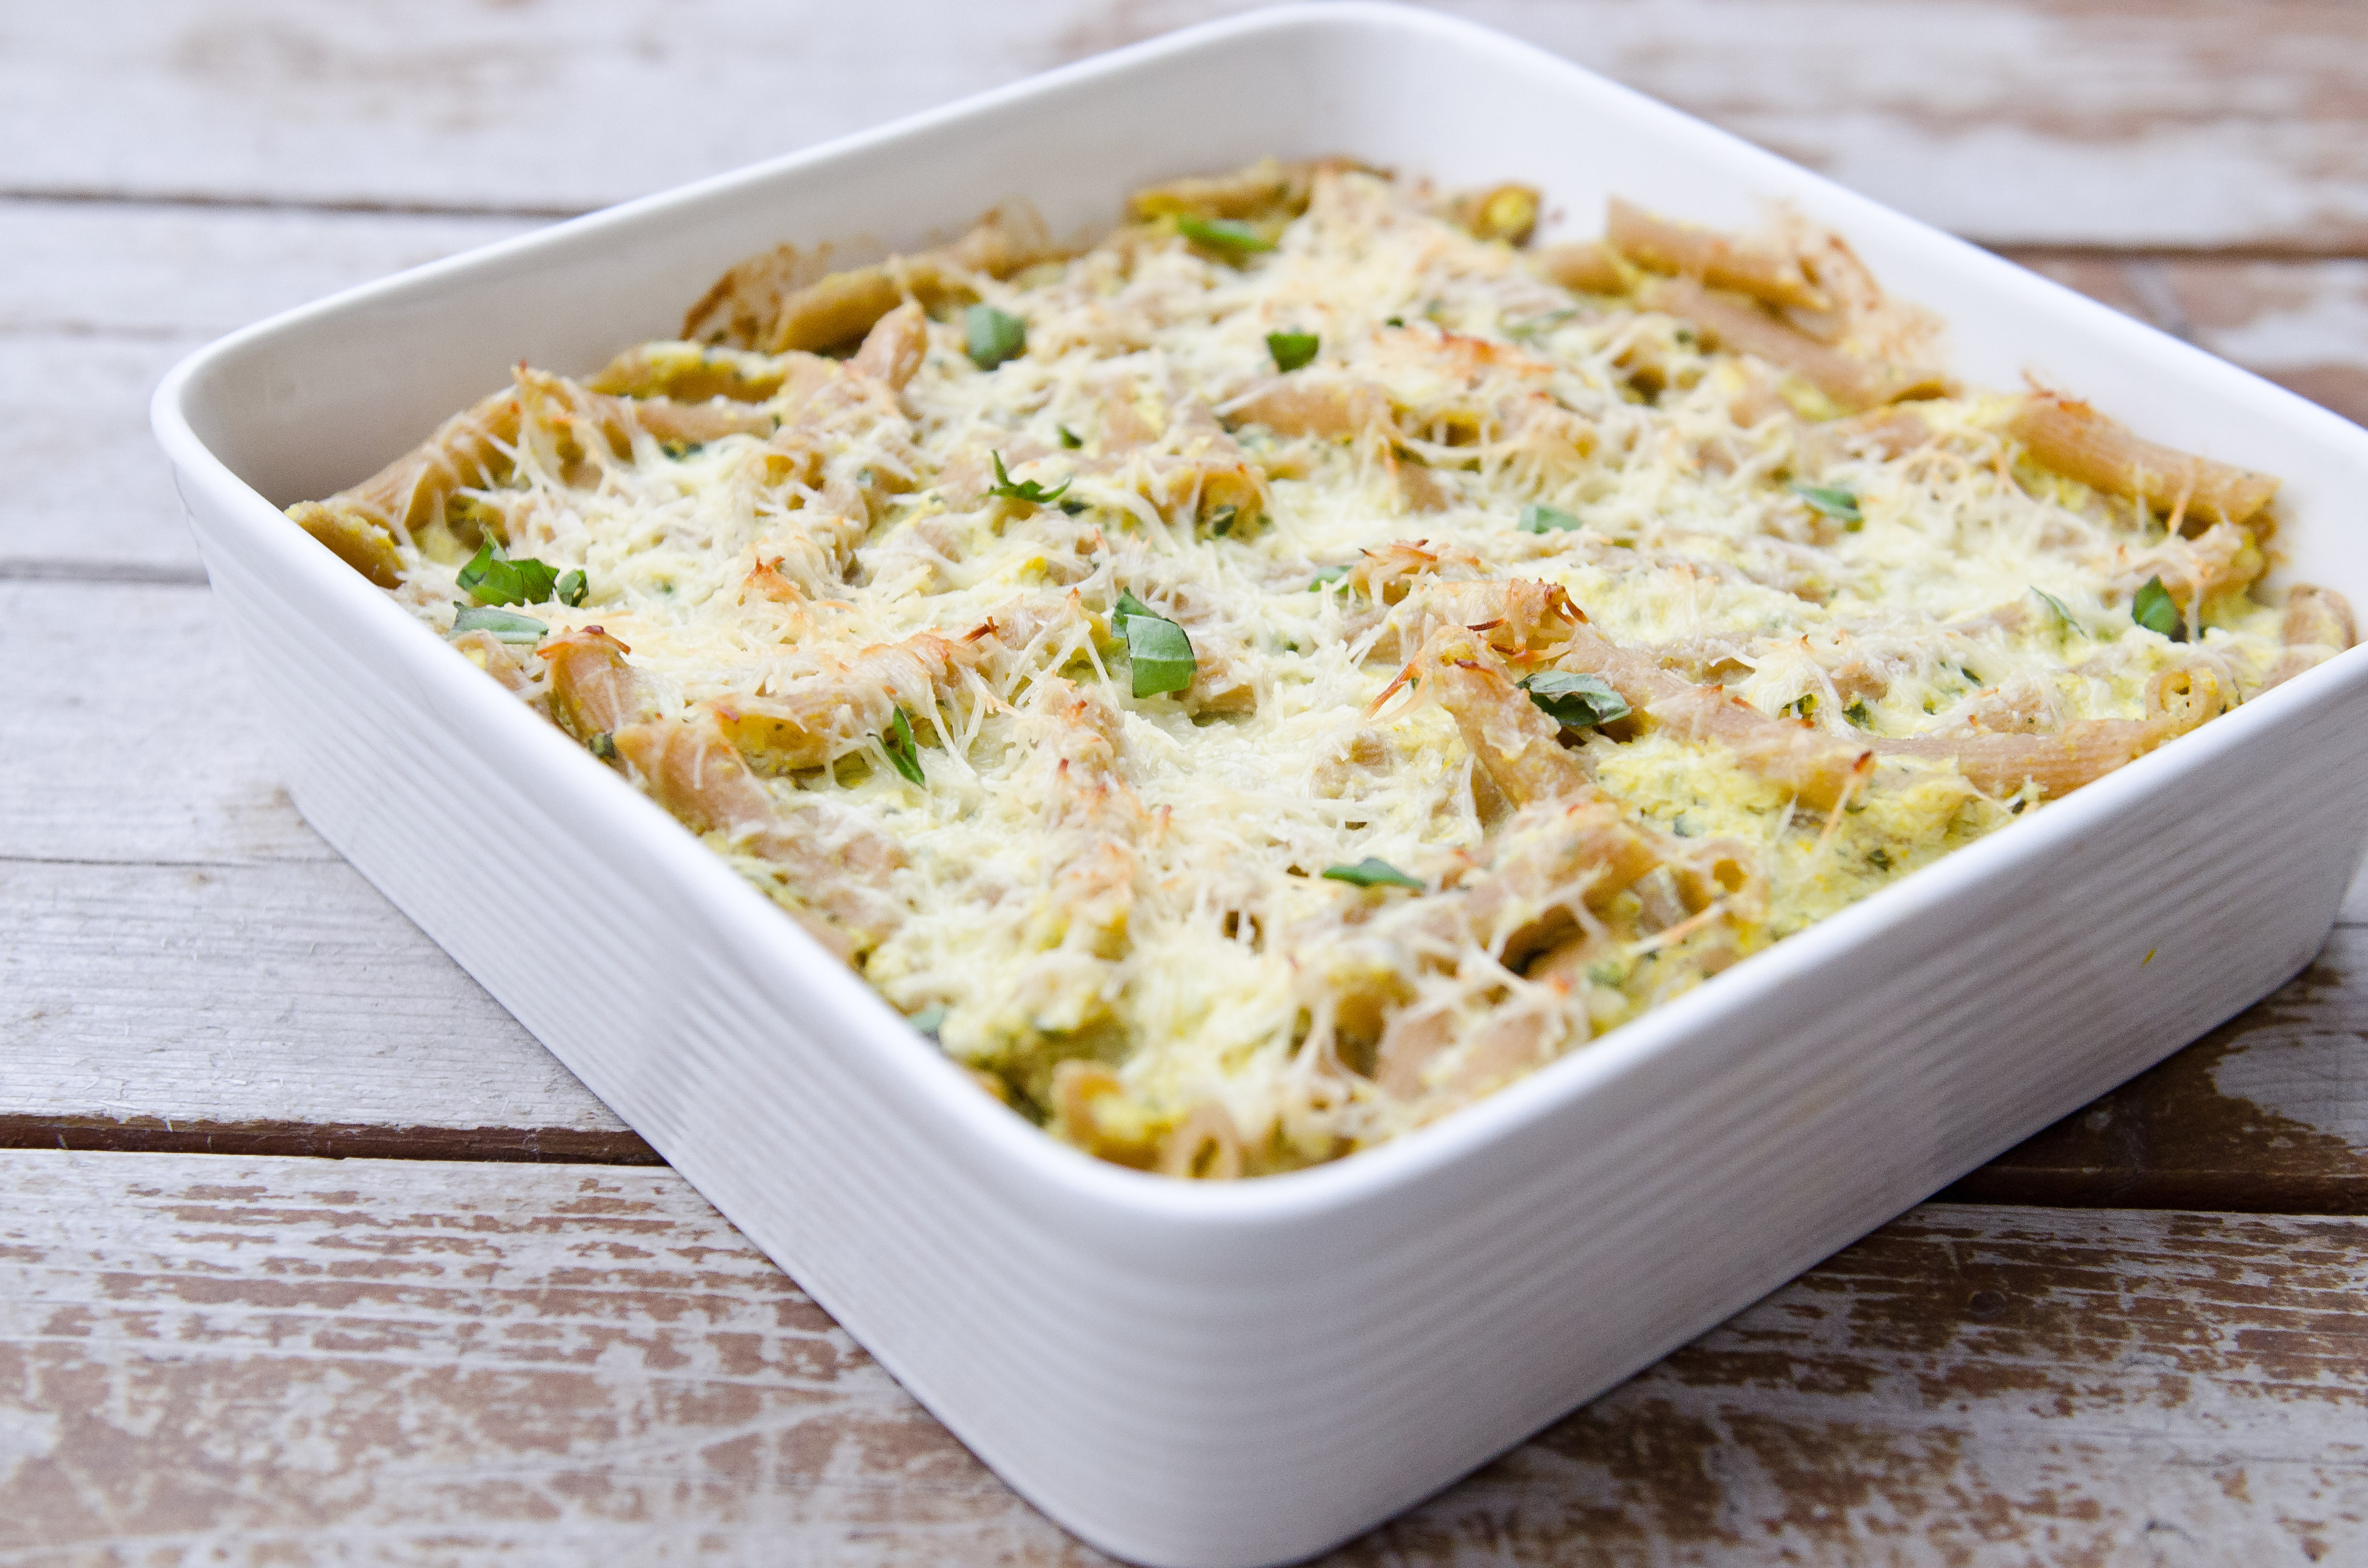
Sunday, Jesse and I decided to make dinner together and then watch the TV series The Killing on Netflix. We were going to watch Arrested Development, but Jesse has to catch up a little bit on the first 3 seasons. For those of you who saw the new season, what did you think!? For dinner, we made this casserole filled with fresh corn, zucchini, a mixture of cheeses, lemon and basil. It was a nice light, summer-inspired dish!

Jesse is such a trooper – as are many food blogger spouses and significant others. Before we could eat, I dragged him outside to help me take some photos of the casserole. Since we live in a condo, a lot of our neighbours are constantly coming and going. Quite a few of them could not quite understand what was going on. Poor Jesse had to hold the casserole dish with lime green oven mitts while I photographed the food. I’m convinced our neighbours now think we are crazy. *hah* Oopsie!

And on that note – here’s wishing you all a wonderful week! Now that I’m in the swing of things again at home, I am hoping to have a new recipe post up on Thursday :)

Sweet Corn & Basil Penne Casserole

Yield: 6 servings

Ingredients

  • 1 pound of dried whole wheat penne
  • 1 large zucchini, diced
  • 1/2 tablespoon of olive oil
  • 2 cups of frozen corn (thawed) or fresh corn
  • 1/2 cup of half & half cream
  • 2 cloves of garlic, peeled
  • 1/2 block of low-fat cream cheese or 1/2 cup of mascarpone; at room temperature
  • 1/2 cup of low-fat ricotta cheese
  • 1 and 1/2 cups of grated parmesan cheese; divided
  • zest of one large lemon
  • juice of half a large lemon
  • salt and pepper to taste
  • 3/4 cup of chopped fresh basil

Method

  1. Preheat oven to 350'F.
  2. Toss zucchini with olive oil and season with salt and pepper. Spread zucchini on a parchment-lined baking sheet. Roast zucchini in the oven for 10 minutes (or until slightly tender).
  3. Meanwhile, bring a large pot of water to a boil. Season with salt. Cook penne according to package instructions until just al dente. Reserve 1/2 cup of pasta water to lighten up the sauce.
  4. In a food processor, purée the corn, cream, and garlic. Add the mascarpone or cream cheese, ricotta cheese, 1 cup of parmesan cheese, lemon zest, lemon juice, salt and pepper. Blend until smooth. Add the fresh basil and pulse until well-combined. Note: if you find that the sauce is too thick, add a little bit of reserved pasta water. You want sauce to be a bit saucy!
  5. Combine the creamy corn sauce with the cooked penne. Add in the roasted zucchini. Pour into a medium-sized casserole dish then sprinkle with 1/2 cup of parmesan cheese. Bake casserole for 25 minutes, or until the top is slightly browned.

Notes

Source: The Fig Tree (sauce loosely based on a recipe from Weeknights with Giada)

Tzatziki Potato Salad

20130520-DSC_8882-3Hello! We’re finally back from our fabulous trip to England and Wales and slowly recovering from jet lag. We’ve been going to bed at 9:00PM and up by 7:00AM the past few days since we got back. I’m never up that early by choice! *hah* Maybe I’ll be a morning-person yet? *hah* Not likely.

Today is the first time we’ve seen the sun in 14 days! It was very rainy and chilly in London. And we came home to similar weather. Alas, today, on my first day back to work…the sun came out! :) Hmmmm…. So, in celebration of a nice sunny, spring day, I’d like to share a recipe perfect for spring picnics and BBQs – Tzatziki Potato Salad! This salad is loaded with wonderful spring flavours such as fresh dill and lemon. And it’s lightened up by using fat-free greek yogurt with only a touch of mayonnaise. Add some garlic, cucumber and a bit of feta cheese and you’ve got one flavourful salad. Feel free to add some freshly chopped mint to this salad. Mint and dill pair up nicely with fresh lemon in this tzatziki.

Have a wonderful afternoon!

Tzatziki Potato Salad

Serving Size: 4 to 6 servings

Ingredients

  • 6 medium golden potatoes, peeled and cut into 1 inch cubes
  • 3/4 cup of fat-free greek yogurt (or plain vegan yogurt)
  • 2 tablespoons of low-fat mayonnaise (or Vegenaise)
  • 1 large clove of garlic, rasped/grated with a microplane grater
  • juice of half a lemon
  • half a cucumber, peeled and grated
  • 2 tablespoons of fresh chopped dill
  • salt and pepper to taste
  • 1/4 cup of crumbled feta cheese (optional)

Method

  1. Bring large pot of water with potato cubes to a boil. Allow potatoes to cook until fork-tender. Drain and rinse potatoes under cold water. Set aside.
  2. Place shredded cucumber in a bowl lined with paper towels. Allow cucumber to sit for about 10 minutes while the potatoes cook, so that some of the cucumber juice is absorbed.
  3. In a small bowl, whisk together the fat-free greek yogurt, low-fat mayonnaise, garlic, and lemon juice. Add drained, shredded cucumber . Season with fresh chopped dill, salt and pepper. Note: if you are using feta, don't use too much salt when seasoning the tzatziki.
  4. In a nice serving bowl, combine the cooled potatoes and the tzatziki sauce. Add 1/4 cup of crumbled feta cheese and mix. Allow potato salad to sit in the fridge or at room temperature for at least 30 minutes before serving to allow flavours to meld.

Notes

Source: The Fig Tree

Teriyaki Tofu Wraps with Macadamia Spread

20130502-DSC_8533-2Greetings from Wales! We are having a fantastic time exploring England and visiting my relatives in Wales. We’ve seen Big Ben, the Tower Bridge, shopped Oxford Street, enjoyed dinner at Covent Garden and had high tea complete with scones, clotted cream and strawberry preserves. Delicious! Our trip is coming to a close and then I will be back with a more regular blogging schedule. :)

I had scheduled this post for while I was gone. but I seemed to have made an error – as it did not remotely post! Oopsie! My apologies! So, without further ado – teriyaki tofu wraps with macadamia garlic spread. These delicious wraps are filled with crunchy veggies, savoury macadamia spread, baked teriyaki tofu and ginger seasoned jasmine rice. They are perfect to bring for lunches or as a light main course meal.

Cheerio!

Teriyaki Tofu Wraps with Macadamia Spread

Yield: 6 wraps

Ingredients

  • 1 block of pressed tofu
  • 1/2 cup of teriyaki sauce
  • seasoned rice
  • Macadamia garlic spread
  • 6-12 inch whole grain or spinach tortillas
  • Shredded carrots
  • Shredded cabbage
  • 1/4 cup of teriyaki sauce reserved for garnish
  • 1 cup of jasmine rice
  • 1 tablespoon of fresh grated ginger
  • Handful of fresh cilantro, chopped
  • 1 tablespoon of rice wine vinegar
  • 1 tablespoon of mirin
  • 1 head of garlic, peeled with top cut off
  • Olive oil
  • Salt and pepper to taste
  • 1/2 cup toasted macadamia nuts

Method

  1. Preheat oven to 350'F. Cut the top off an entire head of garlic. Place garlic on tin foil, drizzle with a bit of olive oil and season with salt and pepper. Fold tin foil over garlic and place in oven. Allow garlic to roast for about 30 minutes. After 30 minutes, add a parchment covered baking sheet with macadamia nuts to the oven. Toast macadamia nuts for 5 minutes while garlic roasts a final 5 minutes as well.
  2. While garlic is roasting for 30 minutes, you can bake the teriyaki tofu as well. Cut the pressed tofu into 1/4 inch slabs. Place tofu pieces in a baking dish. Cover tofu with teriyaki sauce. Bake for 25 minutes next to the roasting garlic.
  3. Bring 1 cup of rice and 2 cups of water to a boil, then reduce to a simmer. Cook on low, covered, for 15 minutes. Remove from heat and allow it to sit another 10 minutes to absorb the last of the water. Once rice is cooked and cooled slightly, add the grated ginger, chopped cilantro, rice wine vinegar and mirin. Mix well.
  4. Purée the roasted garlic and toasted macadamia nuts into a paste with a blender or food processor.
  5. Cut baked tofu into pieces.
  6. Assemble Wrap - place a tortilla on a cutting board. Spread with some macadamia garlic spread followed by some seasoned rice down the middle. Top with baked tofu slices, shredded carrots, cabbage and a drizzle of remaining teriyaki sauce. Roll tortilla as you would a wrap. Repeat with remaining tortillas.

Notes

Source: Cafe Flora Cookbook