Homemade Guacamole

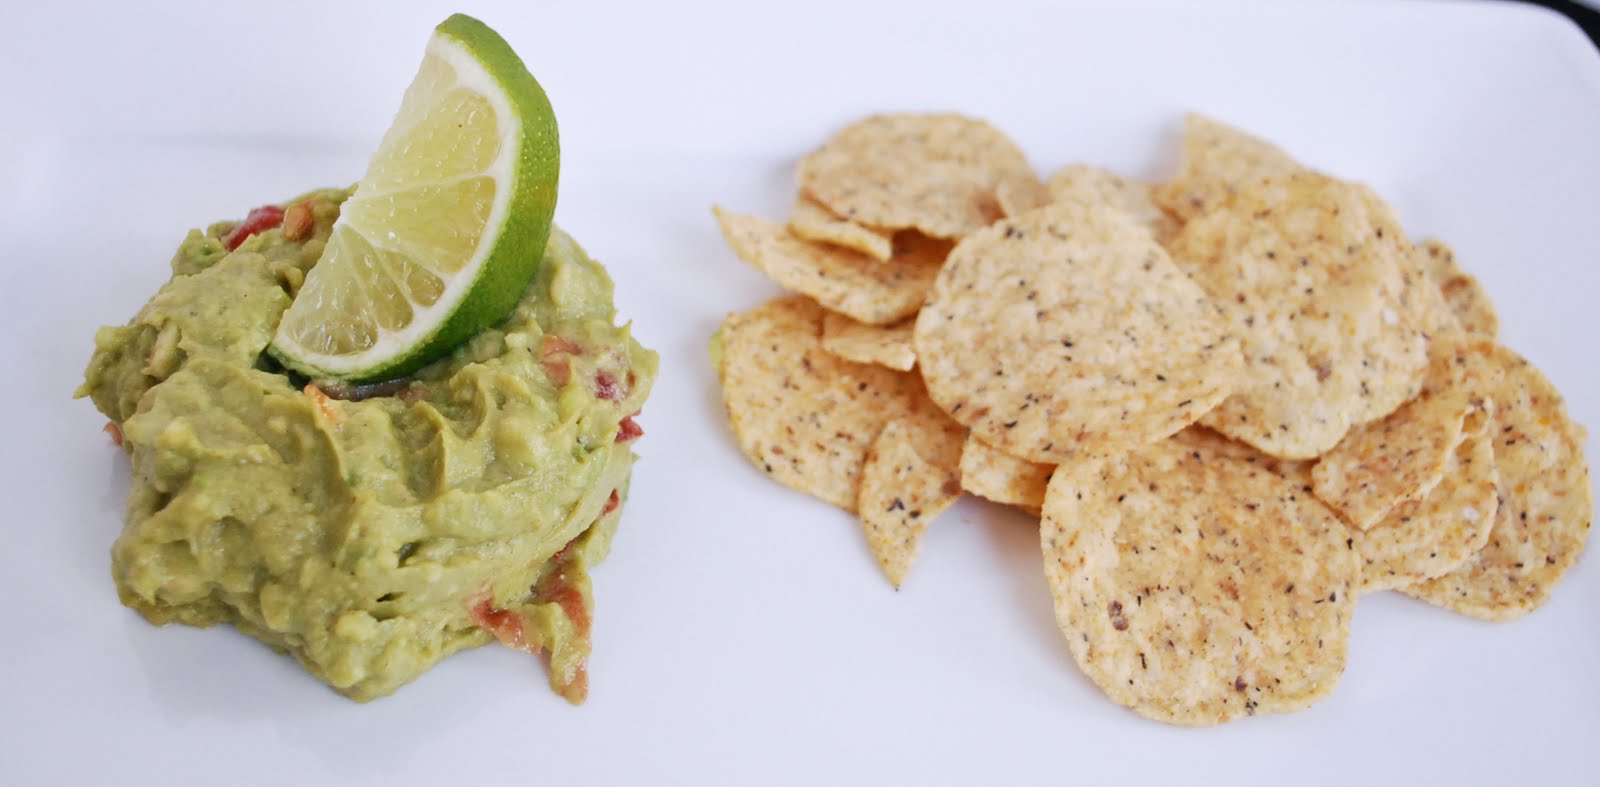
Today it was gorgeous outside; so bright and sunny! And finally, it was actually warm enough to head outside in shorts and a tank top. Yay! After a nice long walk outside today, I had a craving for a big glass of iced tea and some homemade guacamole with chips. Thankfully I had all of the necessary ingredients around the condo!

However, I found that guacamole is not the easiest thing to photograph! *hah* It is not that appealing to look at. But, I promise you…it tastes incredible. This guacamole recipe is extremely easy and would make for an excellent appetizer for a BBQ or picnic this spring & summer. You MAY want to double the recipe. Guacamole has a tendency to disappear quickly whenever I serve it.

Ingredients
  • 2 ripe avocados
  • 1 medium-sized tomato; diced
  • 1 lime (the juice of one lime)
  • 1/2 teaspoon of ground cumin
  • 1/4 teaspoon of black pepper
  • 1/2 teaspoon of coarse salt
  • 1 clove of garlic; finely minced
  • 1 tablespoon of fresh chopped cilantro


Method

1. Cut the avocados in half and discard the pits. Sometimes the pits are difficult to remove. I just hit the blade of my knife into the middle of the pit and turn clockwise. More often than not, the pit pops right out. After you’ve discarded the pit, use a spoon to scoop all of the buttery green flesh of the avocado from the skin. Note: if there are a lot of brown spots on the flesh of the avocado, you may have one that is too ripe and on the verge of going bad. 

To ensure you don’t have an over-ripened avocado, try the following test when choosing an avocado at the store. If you gently press your thumb into the skin of the avocado and it only yields slightly, then you’ve got a perfect avocado for guacamole. If your thumb pushes right into the avocado, it is too ripe. You can tell when it is too soft. The avocado will feel quite mushy. If the avocado does not yield to the pressure of your thumb at all, then it is likely not ripe enough yet. You can leave these avocados on your counter for a day or two and it will ripen nicely. Avocados ripen quickly! So, if you are planning on making guacamole on Saturday and today is Tuesday…you may want to keep the avocados in the fridge until Friday morning to prevent them from ripening too quickly on you.

2. Mash the avocado flesh with a fork until it is at your desired consistency. Then add the juice of one small lime. Mix well. The lime adds flavour and will prevent the guacamole from going brown too quickly.

3. Add the salt, pepper, cumin and garlic. Mix well.

4. Add the chopped tomatoes and mix. Sprinkle with fresh chopped cilantro.

You can use homemade guacamole as a dip for chips, in sandwiches and wraps, or as a condiment for a tortilla soup. One way that I love to use guacamole is in a layered dip. 

For a layered dip: 

Mix 1 (8oz) package of cream cheese (room temperature) with 1/2 cup of sour cream. Mix in a tablespoon of taco seasoning; or more if you like more seasoning. Then, in a small casserole dish, layer the guacamole, 1-15 ounce can of black beans (rinsed), the cream cheese mixture, a jar of salsa and top with a few dollops of sour cream and cover in shredded cheddar cheese. Mmmm! Serve with taco chips and/or crackers.

Enjoy! :)

Source: Courtney Jones

Low-Fat Banana Bran Muffins

If you are looking for a healthy, low-fat muffin to start your morning, but also still want a lot of flavour…look no further. These banana bran muffins are delicious. The mashed banana in the muffins make them so moist and the cinnamon & brown sugar give these muffins a ton of flavour. The wheat bran is soaked in buttermilk before being added to the batter, so the bran itself is nice and moist as well. I just made a double batch of these muffins to freeze to have in the house for breakfasts and/or afternoon snack. They are the perfect treat to have around and freeze well. These muffins are also great to make when you need to use up a few bananas that are starting to go brown. Seems like I always have some in the house. *heh* Enjoy! And have a happy weekend. :)

Ingredients
  • 1 and 1/2 cups of wheat bran
  • 1 cup of buttermilk (or 1 tbsp of white vinegar & 1 cup of skim milk)
  • 1 and 1/2 cups of mashed ripe banana (about 3 bananas)
  • 2/3 cup of light brown sugar; packed
  • 2 large eggs
  • 1/4 cup of vegetable or canola oil
  • 1 and 1/2 cups of all-purpose flour
  • 1 and 1/4 teaspoon of baking powder
  • 1/2 teaspoon of fine salt
  • 1/2 teaspoon of ground cinnamon
  • 1/2 cup of dried fruit (raisins, cranberries, apricots, cherries, currants, blueberries etc)

Method

1. Preheat over to 350’F and grease a 12-cup muffin tin (or use muffin wrappers).

2. In a small bowl, stir the bran and buttermilk to blend and let the mixture sit for 15 minutes, so that the bran can soften up.

3. In a large bowl, whisk the mashed banana, sugar, eggs and oil to blend. Stir the bran mixture into the banana mixture.

4. In a separate bowl, stir the flour, baking powder, salt and cinnamon together. Add the flour mixture to the bran/banana mixture. Stir until just combined. Your batter may be a bit lumpy, but that’s just fine.

5. Stir in the dried fruit. I used currents.

6. Spoon batter into prepared muffin tin.

7. Bake for 20 to 25 minutes, or until the top of the muffin springs back when pressed. Cool for 15 minutes in the tin and then turn the muffins onto a wire rack to cool completely.

Muffins can be kept in an airtight container for up to 4 days or frozen for up to 3 months. Makes 12 large muffins. NOTE: I used a small muffin tin, so I made 24 small muffins.

Source: In The Kitchen with Anna Olson: New Ways with the Classics

Easter Basket Cupcakes

Every year for the past 5 years, I’ve made these cute little easter basket cupcakes. I think they are adorable! I normally make them for my family and bring them to Easter dinner. Although Easter dinner is not until next week, I made a batch of these cupcakes today to give to a good friend of mine. I hope she likes them! I think that these cupcakes are the perfect little easter treat. And, for those of you with kids, this is an easy & fun recipe you can make as a family. The results are delicious!

Ingredients

  • 3/4 cup unsweetened cocoa powder
  • 1 1/2 cups all-purpose flour
  • 1 1/2 cups sugar
  • 1 1/2 teaspoons baking soda
  • 3/4 teaspoon baking powder
  • 3/4 teaspoon salt
  • 2 large eggs
  • 3/4 cup warm water
  • 3/4 cup buttermilk
  • 3 tablespoons canola oil
  • vanilla icing tinted green (use store bought icing or try this recipe)
  • Cadbury Mini Eggs
  • 12 standard pipe cleaners (brown works best); cut in half

Method

1. Preheat oven to 350°. Line standard muffin tins with paper liners.
2. Sift cocoa powder, flour, sugar, baking soda, baking powder, and salt into a large bowl. Add eggs, warm water, buttermilk, oil, and vanilla, and mix until smooth.
3. Divide batter among muffin cups, filling each 2/3 full. Bake until tops spring back when touched, about 20 minutes. Transfer cupcakes to wire racks, and let cool. Cupcakes will keep, covered, for up to 3 days.4. Make frosting if you will be using the homemade kind. I like to make homemade icing, as it always tastes better than the store-bought kinds. However, in a pinch, store bought icing works well. I also recommend that you colour the icing using a gel paste and not liquid food colouring. The gel paste allows for stronger, bolder colours and does not add liquid to your icing & make it runny. You can find the gel pastes at places like Michael’s (craft store).

5. Frost the cupcakes with the green icing. In order to make the icing look a little like easter grass, I used a decorating tip like this one. Place 3 Mini Eggs on the top of each cupcake. Curve the pipe cleaners into a basket handle and stick right into the cupcake. And voila….adorable easter basket cupcakes!

Source: cupcake recipe from Martha Stewart; cupcake design adapted from a cake decorating course I took a few years back.